Showing posts with label Cook from the Book. Show all posts

Thursday, April 22, 2010

Easy Fiesta Chicken Appetizer Squares

Back in November, Connie from Tales from the Fridge wrote me with a great idea. Since we both had so many cookbooks, but often did not use them, we'd motivate each other (and others) to cook from them by this twice a month challenge. We did only a few challenges when Connie went on a strict diet and wasn't doing the challenge. Without her motivation, I didn't continue it, but she is back so I've joined her again. And you are all invited to cook along. Just choose a recipe from a cookbook or magazine and share the recipe with us every other Thursday. Always head over to Connie's blog Tales from the Fridge to add your post to the linky list.

I received this cookbook as a gift in 2002. It's a magazine-type, but there are no ads, just lots of recipes--more than some cookbooks. I've made a few recipes from it like Savory Chicken Vegetable Strudel , but I still have several marked to try.
I had an especially busy day last week so I made these squares along with Sopa de Fideos (that I'll post soon, but not this week...I promise no more recipes this week). They made a good meal together. The squares are kinda like a layer dip. I do think that it isn't very pretty with all the shades of brown. Next time, I will mix the olives with the chicken and add some chopped tomatoes to the top for color and either cilantro or green onions and then put that on top. Maybe it would look better. If you like guacamole (I don't), it'd be easy to add this layer to it and get more color too. But this day, I didn't have time to change it up. You can find the nutritional information for the recipe at Tyson.
Easy Fiesta Chicken Appetizer Squares2 boneless, skinless chicken breasts
2 T. dry fajita seasoning
2 t. canola oil
1/2 medium onion, sliced
1 c. refried beans, canned
1 prebaked pizza crust or 1 focaccia, 10 to 12 oz.
1/2 c. cream cheese, softened
1/4 c. salsa
1/2 c. Mexican cheese blend, reduced fat, finely shredded
1/4 c. black olive wedges

Rub chicken evenly with 1 tablespoon fajita seasoning. Wash hands.

Heat oil in medium nonstick skillet to medium. Place chicken in skillet. Cover and cook 4 minutes. Turn chicken; add onion and 2 tablespoons water. Cover and cook 5 to 6 minutes longer or until onion is tender and chicken is done (internal temp 170°F). Remove from heat.

Preheat oven to 425°. Meanwhile, blend refried beans and remaining 1 tablespoon fajita seasoning in small bowl. Spread evenly over pizza crust.

Blend cream cheese, salsa and shredded cheese in medium bowl. Spread evenly over bean mixture. Shred or chop chicken; top pizza evenly with chicken mixture and olives. Cover and refrigerate until ready to serve.

Place pizza on baking sheet and bake 10 minutes or until heated through and cheese is melted.

Tuesday, December 15, 2009

Cook from the Book: Coconutty Bars


Check out my published content!
Oh, boy! What a mess! I should read recipes more carefully. I’ll explain what I’m talking about in just a minute. I’m sure this list of ingredients looks like bars that you’ve eaten or even made before. What’s so special about these? These are baked in the microwave. Yep, you don’t even have to turn on the oven. So I was intrigued. I do have a couple of recipes for microwave desserts that I like (5 Minute Brownies and Quick Microwave Banana Chocolate Cake) and wanted to add to my list. And I noticed that this is a quick recipe that doesn’t even require you to use a bowl. You just dump ingredients one at a time into the pan.

I found it in this cookbook titled The Simply Delicious Options Microwave Cookbook. It was a "gift" from one of the first credit cards we had long ago called Prime Option. Believe me, we paid enough interest to them to deserve more than a cookbook, as much as I like cookbooks. The cookbook was from 1996 and it doesn't specify the watts used in the microwave in the test kitchen. So that might have been part of the problem. I don't know enough about microwave baking to have a clue.

I was happily making my bars and timed it. It took me less than ten minutes from start to putting it into the microwave for the 8 -9 minutes. I love those kind of recipes. I did add more than ½ cup of chocolate chips being the chocoholic that I am. It just didn’t look like enough, but it ended up being too much even to me. I followed the rest of the amounts. Then it came to the part of the recipe which says, “Put a plate upside down in the microwave, and set the pan on the plate.” I misread it and put the plate on TOP of the pan.

Uggg! That made a big mess. See???

It bubbled up so much that the coconut and chocolate chips were buried and you couldn't see them. The bars were very sticky and looked absolutely nothing like the photo in the cookbook.

But I wanted to try again and I had all of the ingredients, so as soon as the bars were cool enough, I took them out of the pan to use it. (I have only one 9-inch pan.) I used half chocolate chips and half cinnamon chips. I liked that part. As you can see, it still bubbled up high, but this time, just to the top of the pan and it didn't overflow. I was annoyed that it still wasn't right so I baked it almost 2 more minutes on 100%. Then I topped it with chocolate chips and coconut. I had run out of nuts so I just used toffee bits. They looked a little more like the photo than the first attempt, but not really and they turned out too hard after my additional baking.
So, as crazy as it may seem, the first attempt tasted better since the second one was too hard. But it seems more like very sweet carmely candy than a bar. I'm sorry that I can't say you should try it right away. They are really good tasting, but kinda ugly and not at all like the picture. Elisa only tried the hard, second-attempt bars even though I was hesitant to let her, afraid they'd be bad for her braces. She really liked them except for the fact that it was hard to bite. I will eat what is left of the first batch after I took them to my parents' and some of them got eaten. I'll have to put them in the freezer for a while and take one out every now and then since they have pecans and I'm the only one who would eat it. Or maybe I'll call them candy and send them to work with Robin so I don't eat them all. Do you have a good microwave recipe?
Don't forget to visit Connie (our challenge sponsor) at Tales from the Fridge to see what she cooked up and the other bloggers who participated in the challenge. Would you like to join in on the fun? You can find info at my old POST. We'd love to have more friends involved.

Tuesday, December 1, 2009

Cook from the Book: Cream Cheese Apple Torte

Check out my published content!
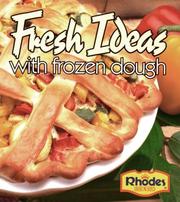
Do they sell Rhodes frozen rolls all over the U.S.? I’d imagine that if they don’t, there are other brands you can buy. I found this recipe in the cookbook "Fresh Ideas with Frozen Dough". I have only made one of the recipes from the book before (which I might get to make again and take pics of someday), but there are a lot that look good. If you'd like to play with your dough, they have lots of recipes online at Rhodes Recipes.

I don’t have a pizza pan (What???) so I used a 9x13-inch pan. It didn’t have quite as much pie filling as the photo in the cookbook did, possibly because of the different pan size. I sprinkled on some cinnamon before popping it in the oven. The recipe doesn’t say if you should serve it warm or chilled. The cream cheese mixture was runny when it was warm (maybe because I used Neufchatel?) so I chilled it a little and then served it. It was hit at our house! And it doesn't get much easier than this!


Cream Cheese Apple Torte
6 Rhodes Texas Rolls, thawed and risen
8 oz. cream cheese
1/4 c. sugar
1 egg
1 t. vanilla extract
1 (21-oz.) can apple pie filling
1/4 c. slivered almonds

Preheat oven to 350°.
Knead rolls into a ball. Roll dough into a 13-inch circle and place on a 12-inch sprayed pizza pan. Mix cream cheese, sugar, egg and vanilla together. Spread on dough. Top with apple pie filling. Sprinkle with almonds. Bake for 25-30 minutes or until golden brown.


Check out other cooks' recipes from this week's challenge at Tales from the Fridge.

Tuesday, November 17, 2009

Cook from the Book: Chicken Salad with Spicy Sesame Sauce


Check out my published content!

Well, today is my first Cook from the Book post. You would think I would do somthing more spectacular for the premiere, but this recipe is healthy, full of flavor and pretty fast to make. I really like how this salad turned out, but thought it was funny that I didn't realize how close it is to another recipe I already make called Won Ton Salad. But this new recipe has sesame oil and I enjoy the unique flavor that it brings. I would have been the only one to eat the asparagus so I left it out, as well as the Dijon mustard. I sprinkled the chicken with salt and pepper, which isn't in the recipe.

Don't forget to check out Connie's recipe (she IS the one who started this) at Tales from the Fridge and check out all the links to the other cooks who are participating in the challenge. And if you are posted a Cook from the Book post today, make sure to add your link while you're at Connie's.

Chicken Salad with Spicy Sesame Sauce
1 lb. skinless, boneless chicken breasts
2 T. reduced-sodium soy sauce
2 cloves garlic, minced
½ lb. asparagus, tough ends trimmed
¼ c. orange juice
2 T. chopped fresh cilantro or parsley
2 t. apple cider vinegar
2 t. Dijon mustard
1 t. firmly packed brown sugar
¼ t. hot pepper sauce
1 T. dark Oriental sesame oil
3 carrots, shredded
1 red bell pepper, cu into 2-inch julienne strips
6 c. shredded romaine lettuce
1 T. sesame seeds

Preheat broiler or prepare grill. Combine the chicken, soy sauce, and garlic in a sturdy plastic bag. Push out al the air, seal and marinate in the refrigerator for 20 minutes. Remove the chicken from the bag and broil or grill 6 inches away from the heat, turning once, for 8 to 10 minutes, or until the chicken is just cooked through. Set the chicken aside to cool slightly.

Meanwhile, bring a medium skillet of water to a boil and reduce to a simmer. Add asparagus and cook until crisp-tender, about 6 minutes. Drain and set aside to cool slightly.

In a small bowl, whisk together the orange juice, cilantro, vinegar, mustard, sugar, pepper sauce, and sesame oil.

Cut the chicken into strips and place in a large bowl. Cut the asparagus into 2-inch lengths and add them to the chicken. Add the carrots, bell pepper, and orange juice mixture, tossing to coat. Place the lettuce in 4 bowls and spoon the salad on top. Sprinkle with sesame seeds and serve warm or at room temperature.

Helpful hints: The asparagus can be cooked in the microwave; put the spears on a plate, cover with plastic wrap, and cook on high for 2 to 3 minutes, or until tender.

For best results, serve at room temperature as chilling will mute flavors.
Makes 4 servings
Nutritional info per serving: Fat: 6g, Calories 243, Saturated Fat: 1.1g, Carb. 15g, Cholesterol 66mg

This recipe is from the Time Life cookbook Great Taste-Low Fat Chicken Breasts that I got as a gift (along with several others in the series) years ago.

It is spiral bound (but the spine is covered) so it lays open easily. Every dish has a color photo. Don't you love that? While I was going through this cookbook to find a recipe for this challenge, I noticed that I had already posted one of the recipes from this cookbook, but I hadn't remembered where I got it from. It was Chicken Breasts with Hearty Mushroom Sauce.
Once I make a recipe and I like it, I copy it onto my computer files so I don't always have to look for it in the cookbook.

Wednesday, November 11, 2009

Wanna Join Us?

A few posts ago, I mentioned that I own lots of cookbooks, but still go searching online for new recipes all the time. Connie from Tales from the Fridge left a comment on that post saying that she is like me with her collection. She had the great suggestion that we start actually cooking from our cookbooks (or cooking magazines) and post the results twice a month. What a great idea! I'll actually going to open some of those cookbooks that I haven't used in quite a while.


Check out my published content!
So whether you have just a few cookbooks or hundreds, feel free to join in the fun! We will post the recipes the FIRST and THIRD Tuesdays each month. That's not too hard even for a beginner, right? Just grab the button Connie made (Yay, Connie!) above to include on your posts. Connie's even going to start a MckLinky for it, which I've seen, but never used so I'm hoping she'll teach me. I look forward to seeing Connie's first post from the challenge and hope many of you will join us. Who's in?